A Guide to Spot UV and Raised Spot UV
September 4, 2024
When it comes to making your stickers or labels stand out, techniques like Spot UV and Raised Spot UV are excellent choices. These methods add a layer of visual and tactile appeal to your designs, making them particularly effective as marketing materials. Here’s everything you need to know to prepare your artwork for these finishing processes and how to make the most of them.
What Are Spot UV and Raised Spot UV?
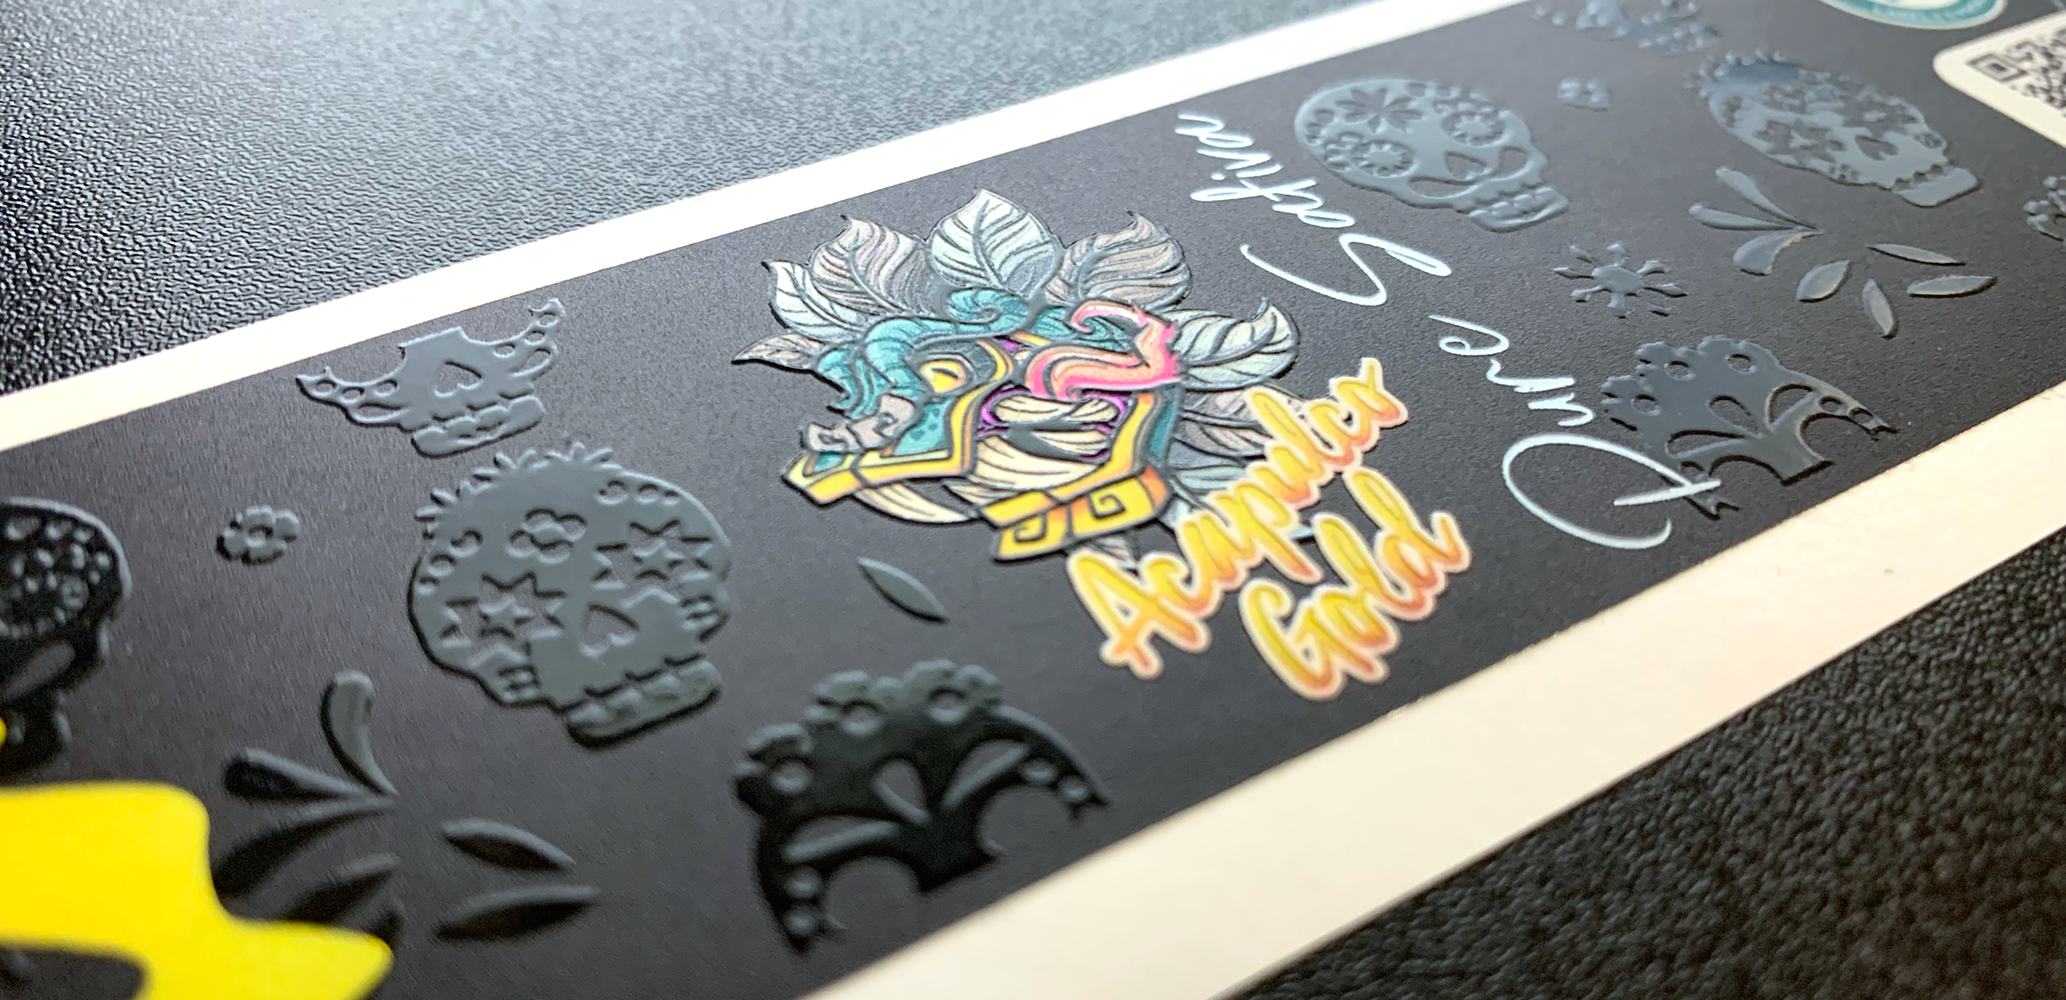
Spot UV is a clear gloss coating applied to specific areas of a design, giving it a shiny contrast against the matte or uncoated parts of the print. This technique enhances details and adds a sophisticated touch to the printed material. It has been popular for years and provides a subtle, flat gloss effect.
Raised Spot UV, a more recent development, adds an extra dimension to the print. Introduced in 2018, this process not only applies a clear gloss but also raises it above the surface, creating a noticeable, tactile effect that stands out more prominently than traditional Spot UV. This can involve multiple layers of Spot UV, some machines can achieve this effect in one pass.
Benefits and Applications
Both Spot UV and Raised Spot UV are effective for catching attention and adding a premium feel to your print products. They work well on various materials, and can contrast with textures like estate paper.
How to add a spot UV layer:
Note:
Vector-Based Elements. Ensure that the elements on the Spot UV layer are vector-based. Vector graphics guarantee sharp, clean edges, which are essential for high-quality results. Avoid using raster or bitmap images for these areas.
- For Spot UV, create a new layer in your design file and name it “Spot UV.”
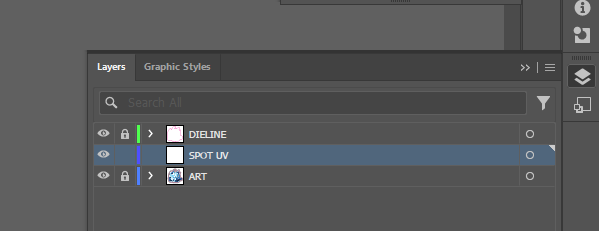
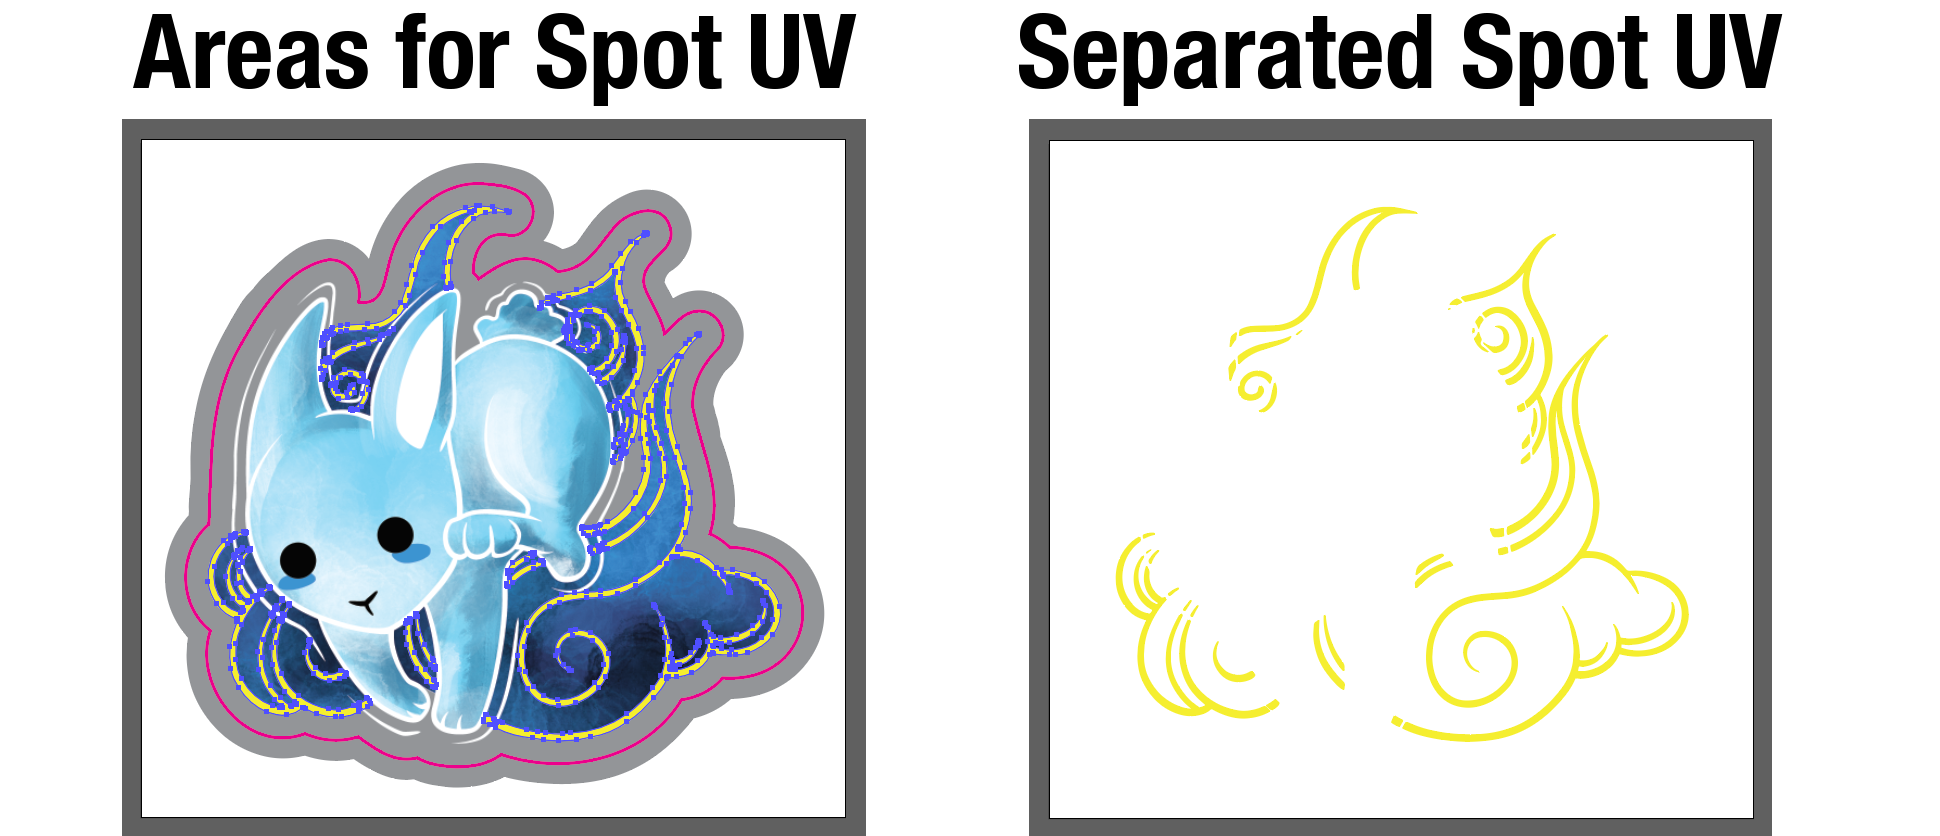
- Select what you would like to be spot uv'd in your artwork and place it into the new layer you created. We separate it in a different layer within your layers tab for ease.
- Double click on the purple swatch. In-house we use Purple, but you can use a distinctive color (e.g., 100% magenta) to mark the areas where you want the Spot UV or Raised Spot UV applied. Name the swatch “spotuv”.
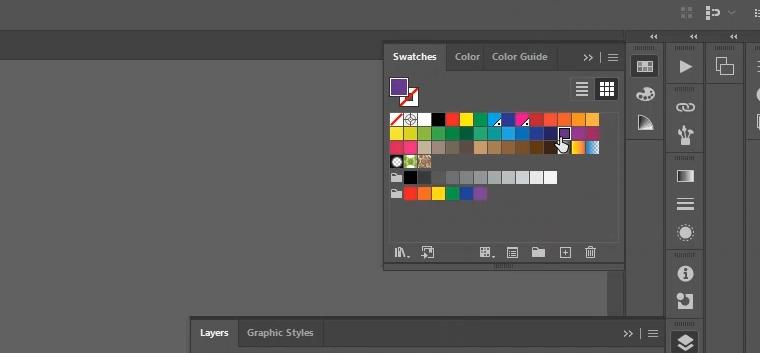
- Drop down the Color Type and select “Spot Color”.
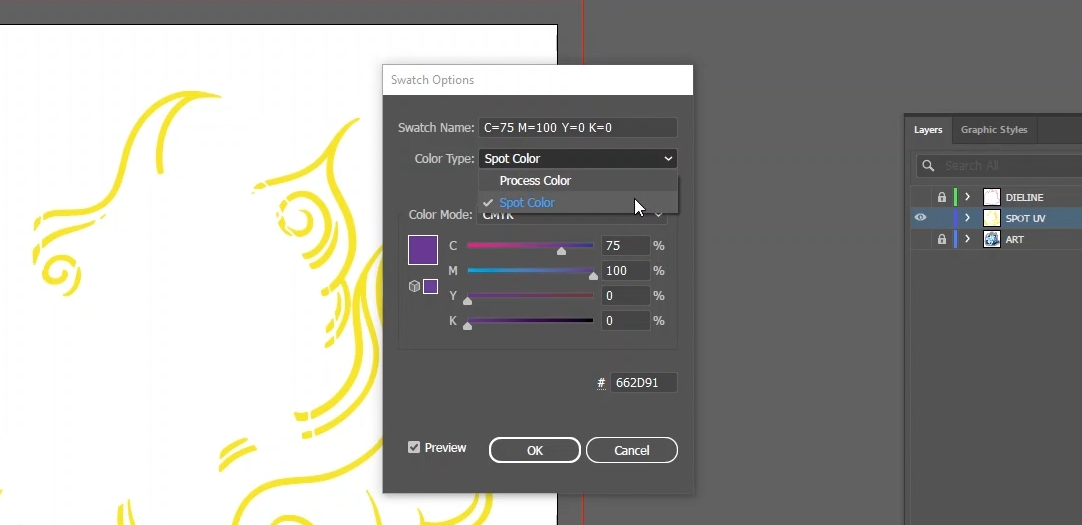
- Hit OK.
- Select your elements and change the color to your "spotuv" swatch. Everything that is selected and made into this “spotuv” swatch will have a clear UV ink layer on top of the print.
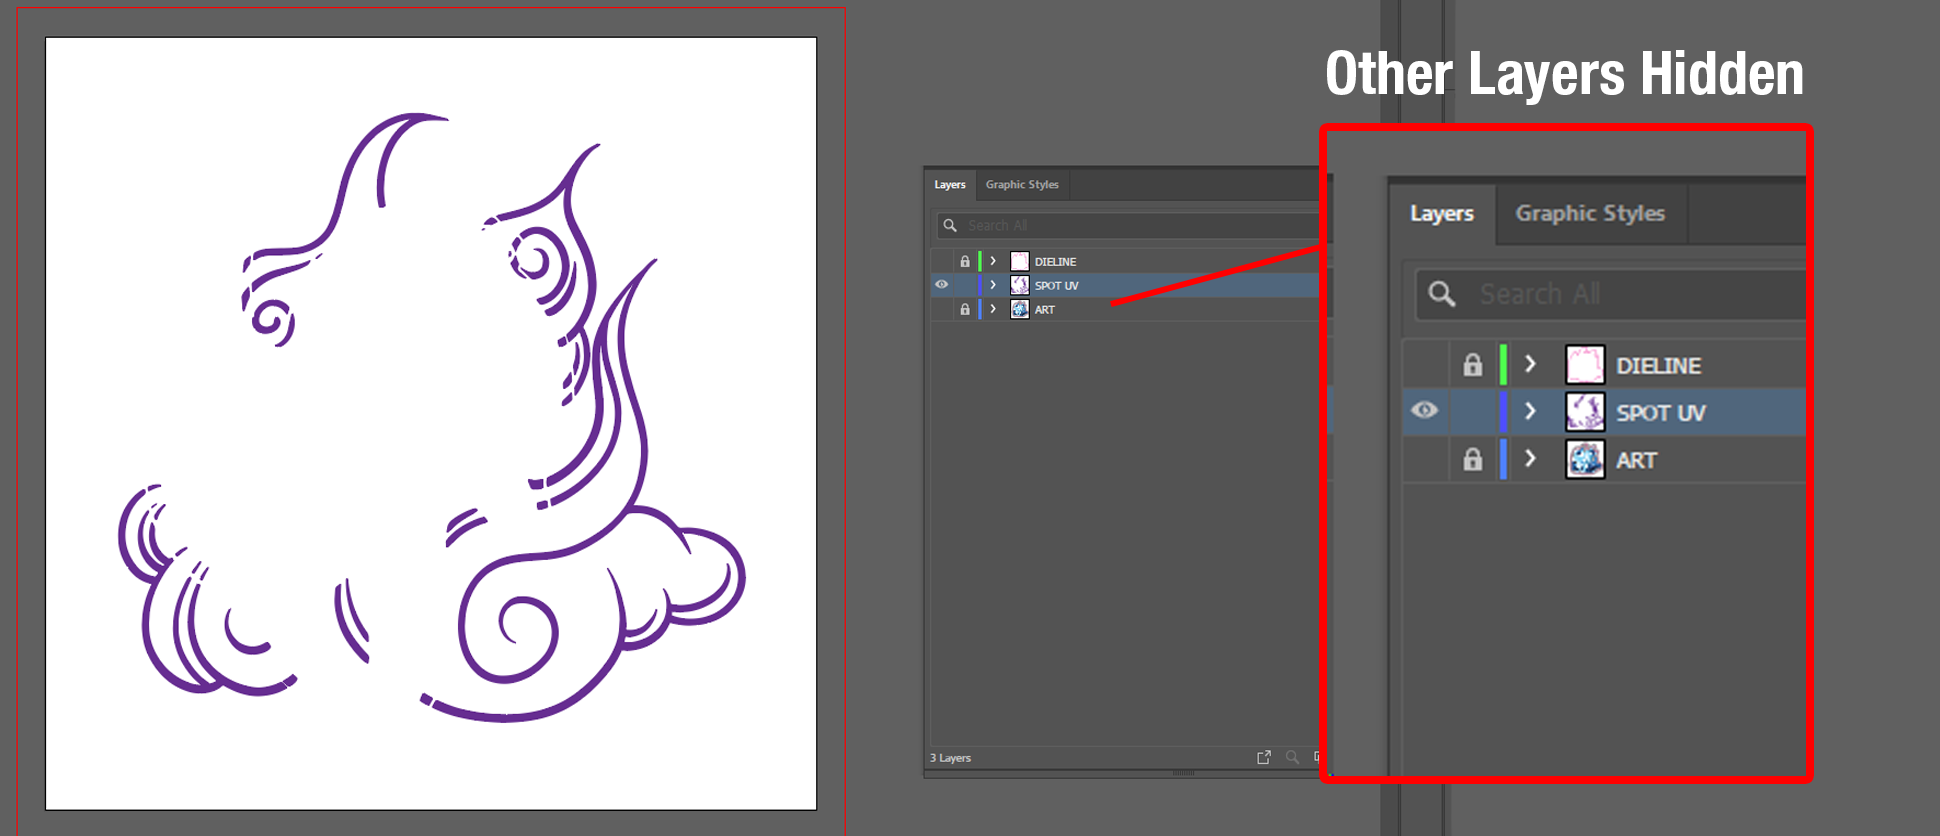
- In order to save this layer, it needs to be saved with nothing else visible—only the spotuv layer (like above). Ensure this layer contains only the elements you want to highlight with the coating.
- Save it as a PDF in the same location as your artwork/cut file.
- To differentiate the file from the artwork, name it with a “_spotuv”.
Specific Considerations- Spot UV can be placed on both front and back labels for your product. It is important to create a file to specify the Spot UV areas. Avoid applying Spot UV on fold lines as it can crack.
- Raised Spot UV also requires a vector file. Due to its thicker gloss, coverage should not exceed 30% of the surface to prevent drying issues and sticking. Raised Spot UV can be be placed on front and back labels for your product.
Advanced Techniques
- Blind
Spot UV: This involves applying the gloss over areas not covered by
printed elements, creating a unique texture.
- Combining with Foil: Spot UV can be combined with our digital heat stamped foil for an extra layer of sophistication. Ensure at least ⅛ inch separation between Spot UV and Foil applications.
By following these guidelines, you can effectively use Spot UV and Raised Spot UV to enhance your print materials, making them more eye-catching and memorable.
For more information or need help with your labels, contact us at 1888-958-5611 or sales@manystickers.com